Do You Know You Can Create Square Brush in Photoshop?

Read | Loved by: 22428
It feels good when you customize something. Not all software will allow you to customize or create any effects or drawings. But, with the help of Adobe Photoshop, you can do that easily. In this blog, you will know how you can get a square brush in Photoshop.
You will find many related presets from various websites. Yet sometimes it’s hard to get the exact desired image from any website. So, it’s always better to create or customize your own tools to match exactly what you need. So, let’s dive directly into how you can create a square brush in Photoshop.
How to Create Your Own Square Brush in Photoshop
Creating a square shaped brush is very easy. If you follow these steps and learn properly, not only square brush shape in photoshop, you can create your own brushes in any shape.
Step 1: Click on files, and select new.
Step 2: On the new panel set the Width and height to 50 and make sure the options of width and height are selected to pixels. You can also set the resolution to 300. It depends on the project that you are working on.
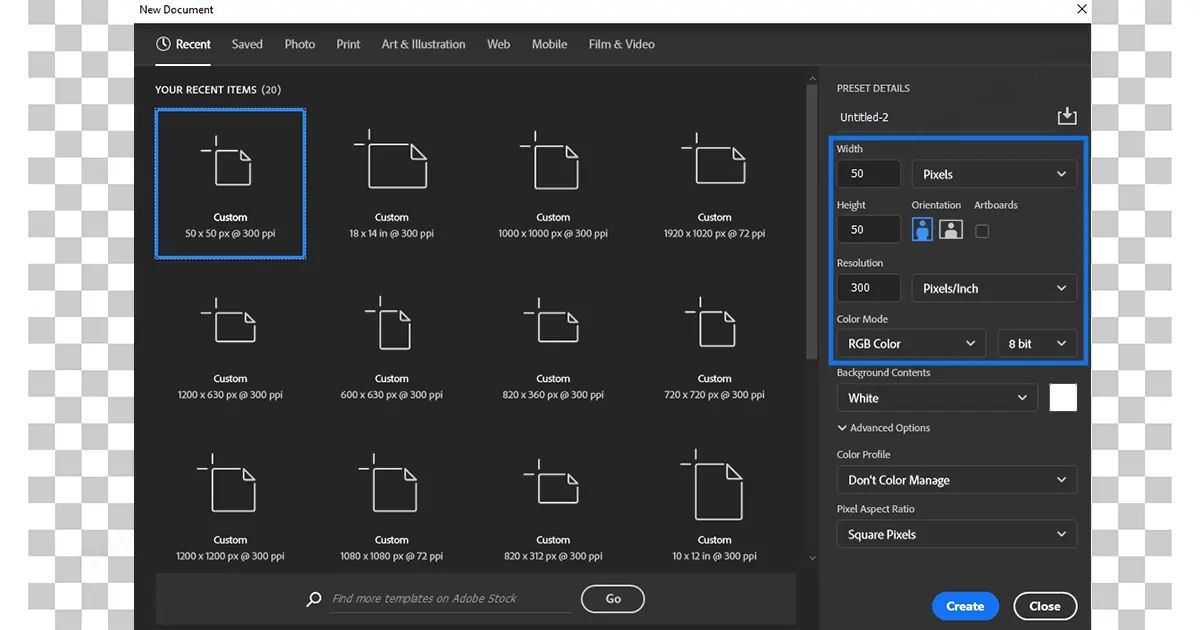
Step 3: You can change the options depending on your requirements but for a square brush, this is all you need to do. Now click, ok.
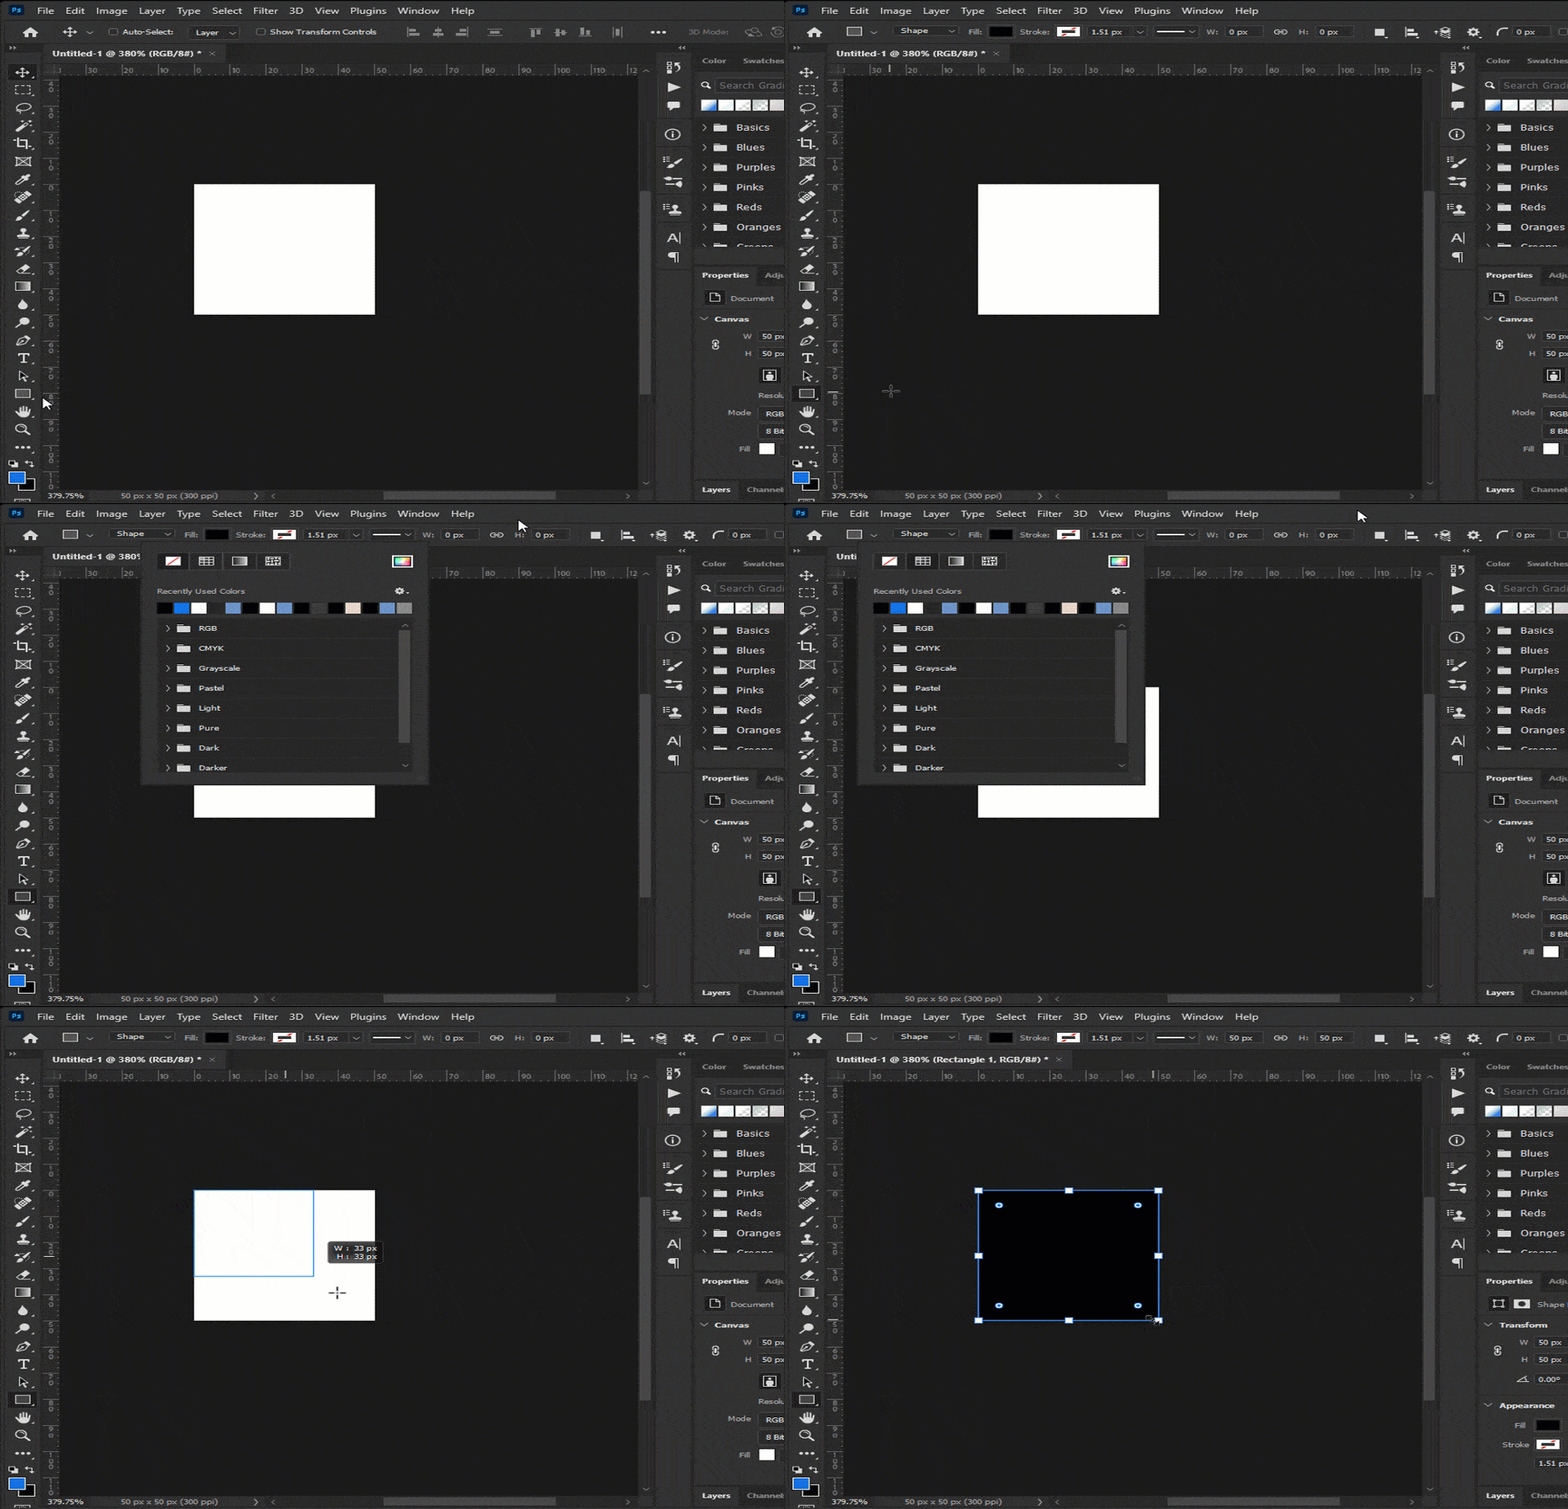
Step 4: Select the rectangular tool from the left toolbar. Go to the stroke option and remove any stroke that it has.
Step 5: Go to Fill and select a solid color. For now, I’m choosing black here.
Step 6: Now make a rectangular shape and make sure you fill-up the box with that rectangular shape.
Step 7: Then click on the checkmark from the top toolbar.
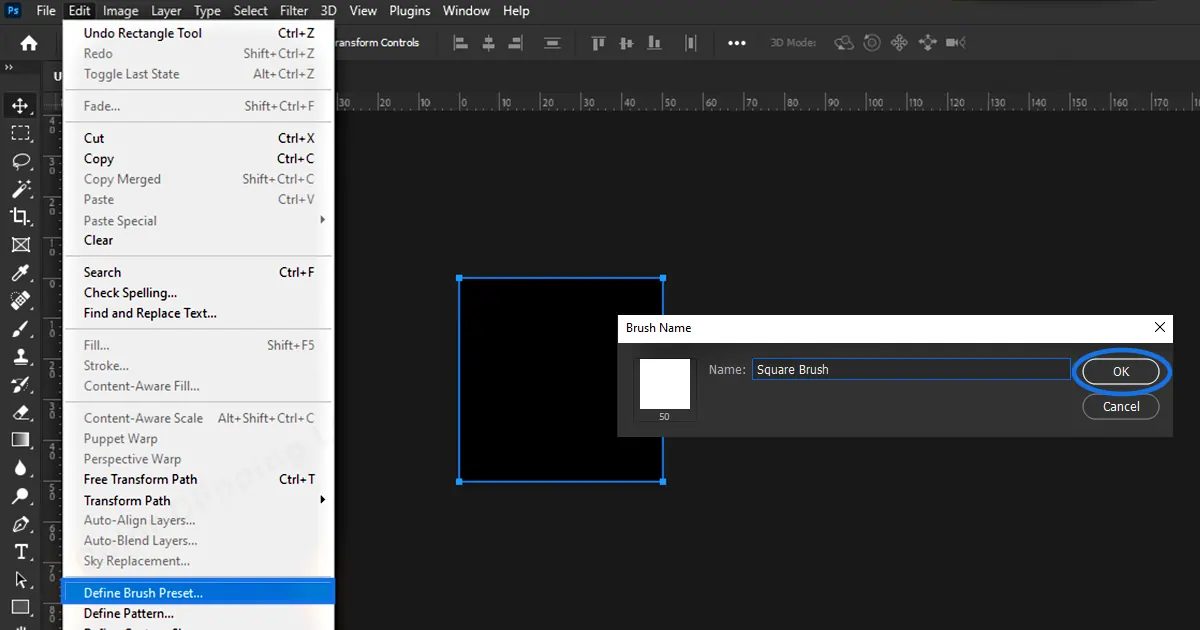
Step 8: So, to edit option and select define. Go to the brush preset and name the brush whatever you like, related to the shape. For now, let’s name it square brush.
Step 9: Now select the brush tool and select the brush you just created ‘Square Brush’.
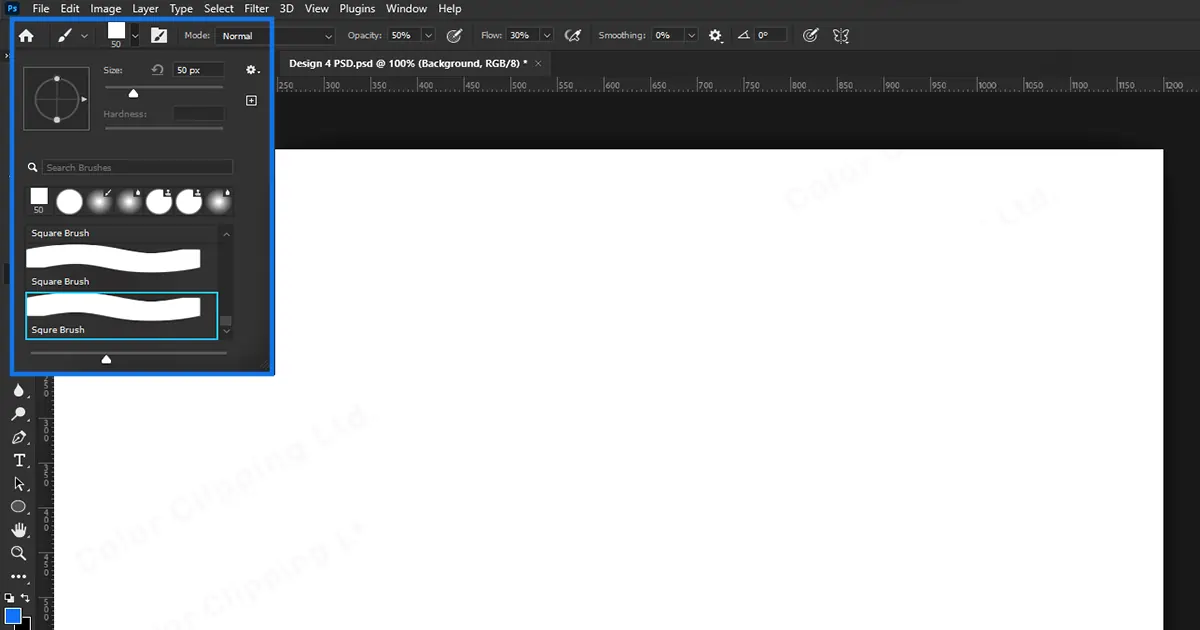
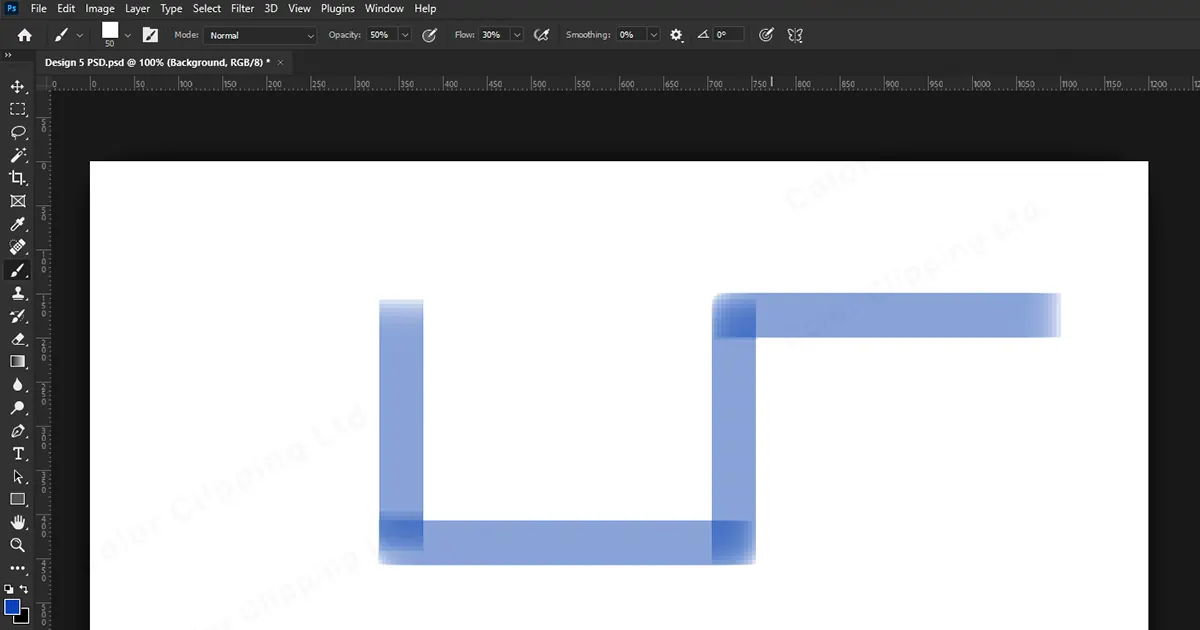
Step 10: Draw whatever you want now with the square brush tool.
Some Fun Facts About Brush Tool in Photoshop
Now that you know how to create a square brush tool let’s find some more interesting stuff about the brush tool.
- You can adjust the opacity with your keyboard. How? To do so, just click on the “[“ and “]” on your keyboard. Now set the opacity to type a number. suppose, you type 5 then it will select 50% of the opacity. And if you select 1 it will select 10% opacity.
- If you are working in Photoshop and created a brush shape that you think might come in handy in the future then you can save the brush shape you just created. For this, go to the Brush Preset list. You will find it in the top left side of your screen and click on the “Create New Tool Preset” button and name it as you wanted for the preset. Then, click Ok.
- Using one of the tools as the brush, dodge, burn, and eraser tool, you can quickly show the brush panel for choosing a brush. By right-clicking on the image, the brush panel will appear by itself. By double-clicking the brush you wish to use, you will be able to select it and exit the panel in one step.
Brush tools are mainly used for any kind of painting on layers. But it provides a big help in many photo editing services like product photo editing and also in those editings where you need some objects to look smooth like jewelry photo retouching.
Finishing With
Adobe Photoshop is a magical software already. And we all are aware of it. You can do the unthinkable with Photoshop. And the process is getting even easier day by day. Not only square shaped brushes. You can make various kinds of brush shapes with Photoshop just by using the same technique.

