Photo Editing

Clipping Mask in Photoshop is a powerful tool you can use to create creative designs for your brand. For example, you can combine text and images to tell your brand story uniquely. Since you clicked on this blog, I assume you want to learn how to make Photoshop Clipping Mask. You are at the right place. Continue reading and I will show you the easiest method for image clipping with editing tips.
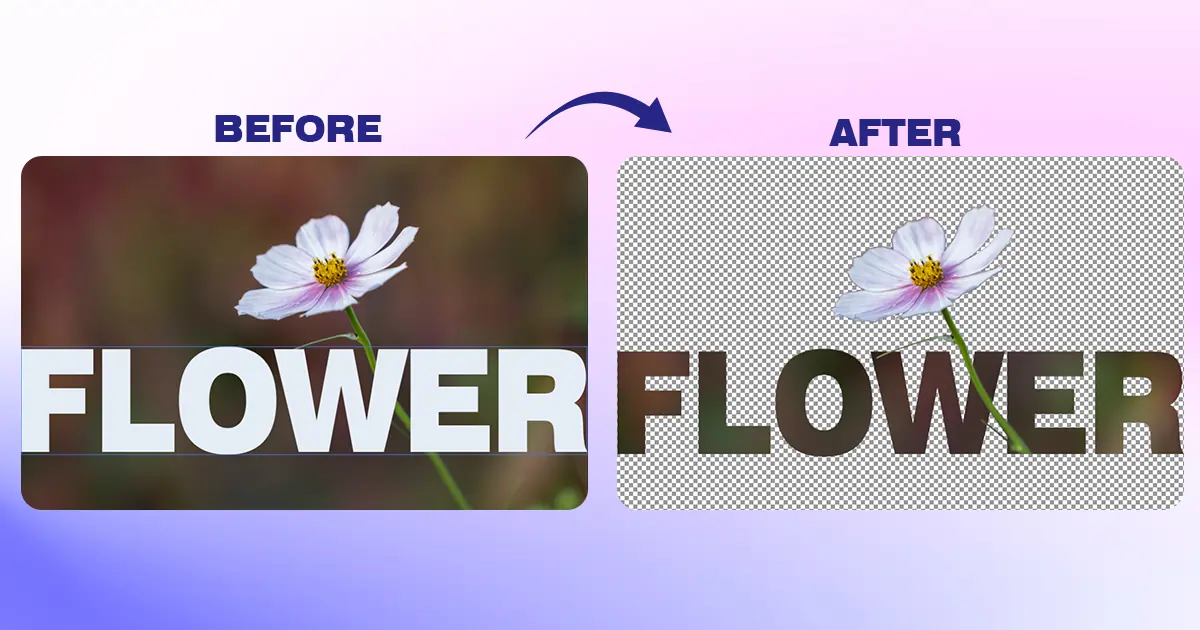
Did you ever see the scenarios popping up from the texts and shapes?
These are the magical works of Clipping Masks. Image Clipping Mask is a technique where one layer is revealed by another layer (a shape, text, and other things) making the image interesting and unique.
You can make Clipping Mask photos in Photoshop for text effects, image framing, blending textures, and other things. Portray your message creatively to your audience and engage with them on a deeper level.
Many people and new designers get confused between layer masks and Clipping Masks in Photoshop and think of them as the same. However, both tools are different and bring different visual effects. Let's see the difference between layer masks and Clipping Masks to apply them better in designs.
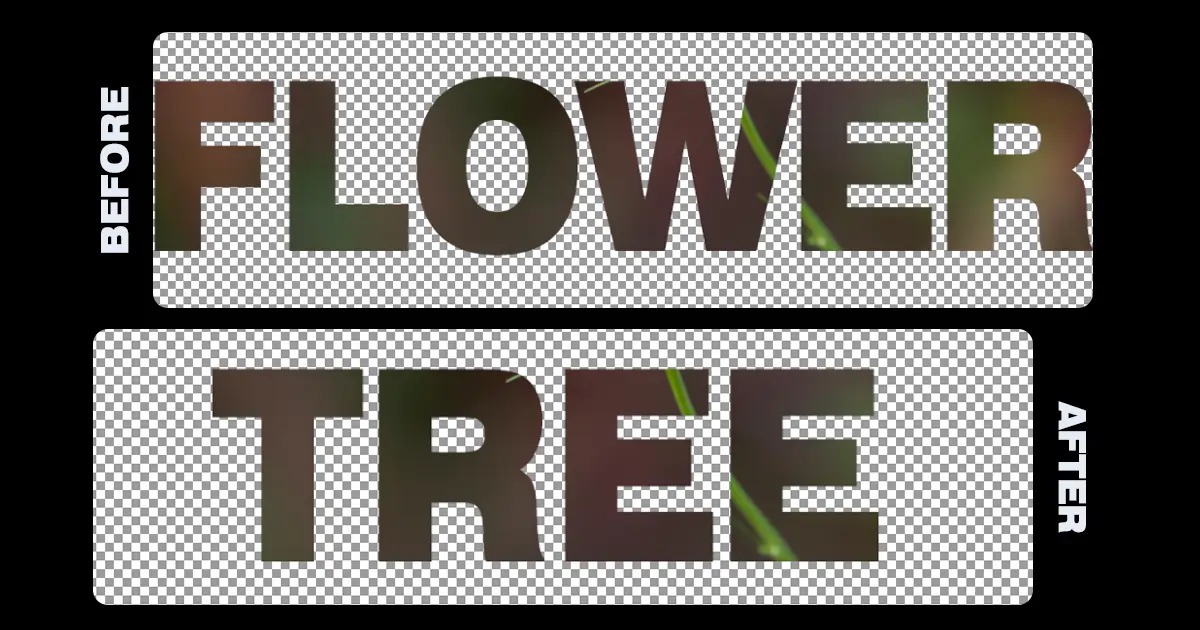
Did you understand the difference between Photoshop layers masks and Clipping Masks? If, yes, let’s get into the main part of the article. Follow this step-by-step tutorial for Clipping Mask photos in Photoshop. I will create a text effect with the easiest masking technique.
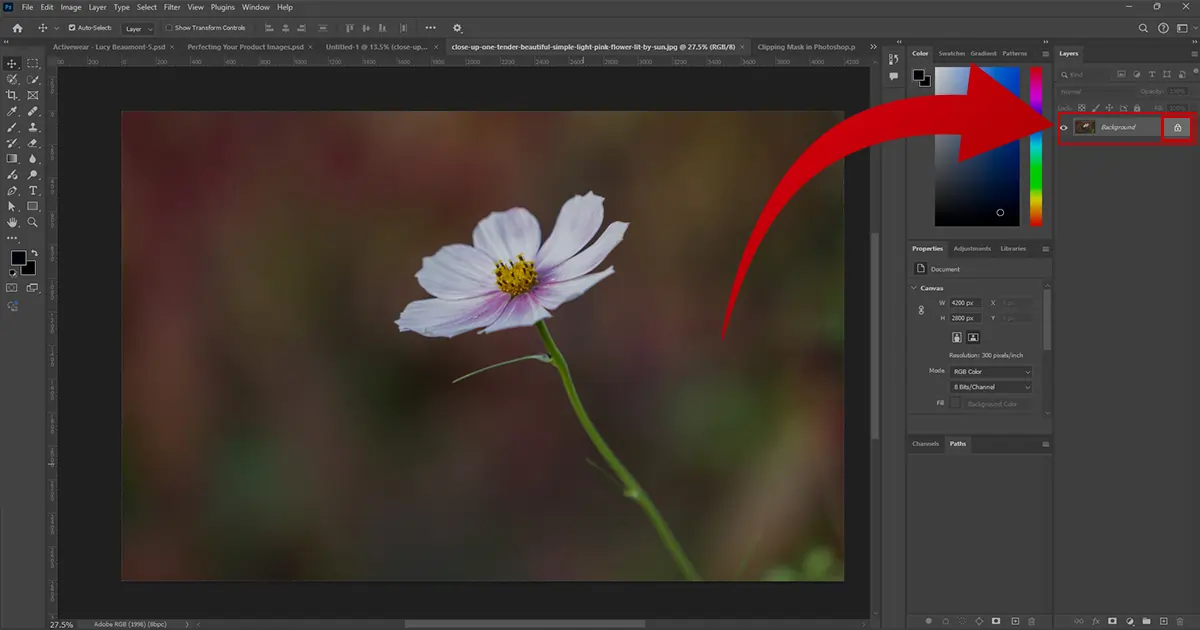
Take your desired image to Photoshop. Go to the layers panel and unlock the image layer by clicking on the “Lock Icon” beside it.
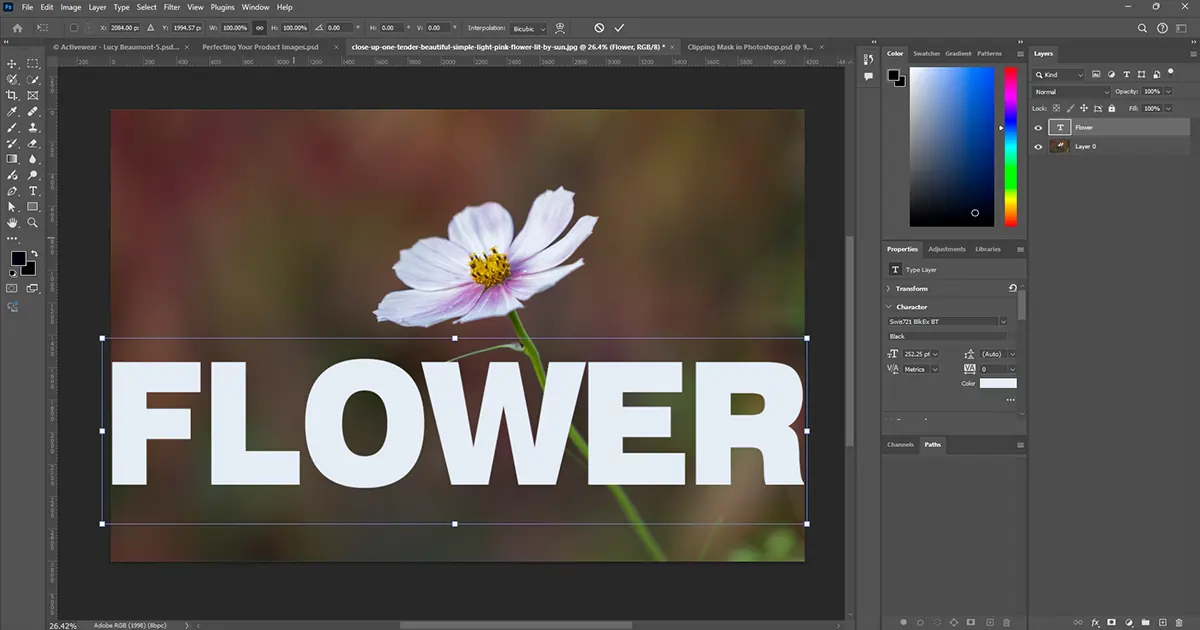
Go to the Toolbar and choose the "Text Tool" or press "T" to select the text tool. The text box will appear on the image. Add your desired text and adjust the text size. Place the text in your desired place.
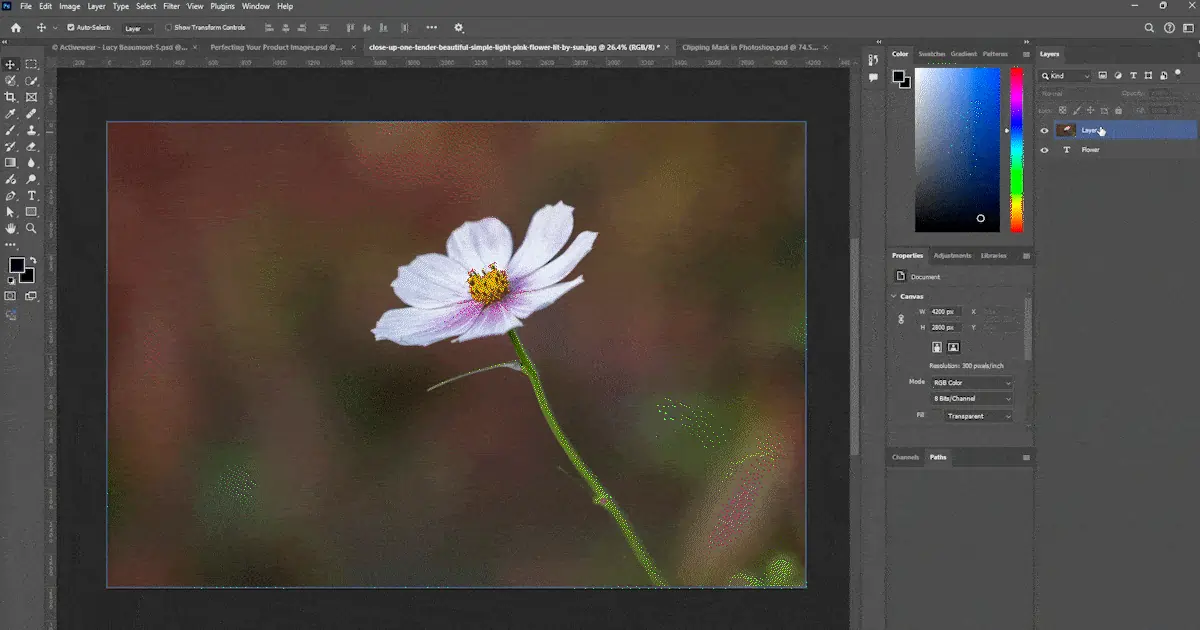
It is time for the magic. Take the image layer above the text layer. Keep the cursor between the Photoshop layers and Press and Hold "Alt-key". The cursor shape will change into a "box and arrow". Now, left-click and see the image transformation. The layers combined and created a nice text effect, correct?
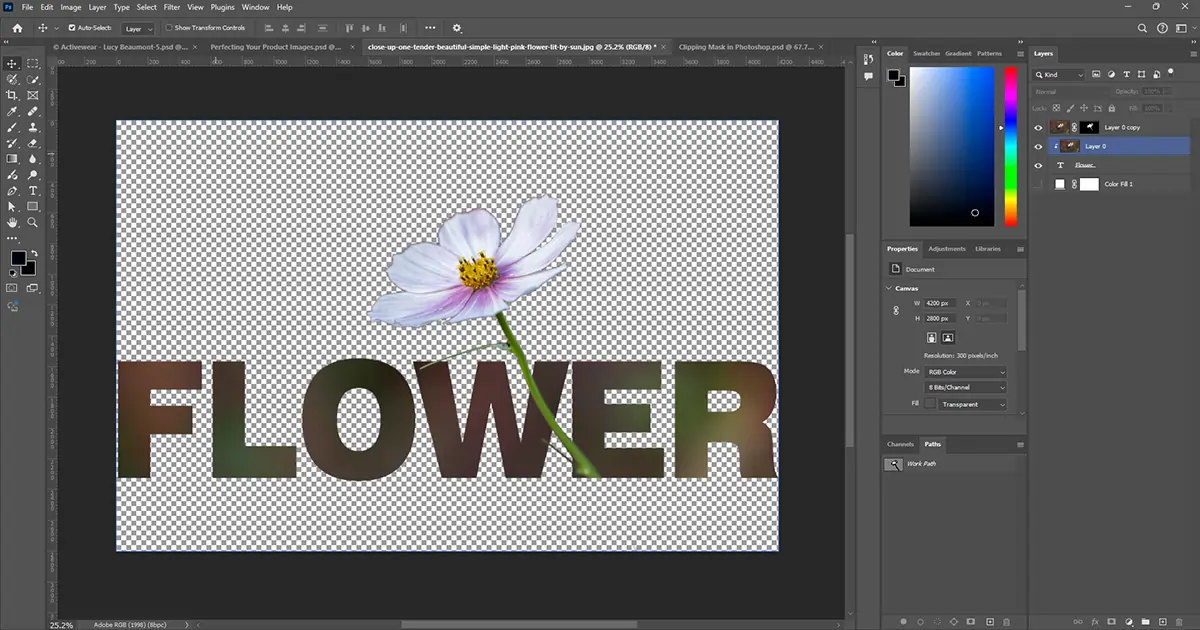
Do you want to bring the object out of the text? Follow this clipping masking technique.
Duplicate the layer by pressing "Ctrl + J" on your keyboard. Now, you need to select the area you want to bring out of the text. Go to the toolbar - choose "Quick Selection Tool" - select the area.
After your selection is completed, go to the layers panel and select "Layer Mask" Photoshop to reveal the area you just selected and hide other areas of the layer. The final image will pop up the object out of the text.
The best thing about Clipping Mask in Photoshop is you can edit them anytime. For example, your previous text was cartoon but now you want to change it into anime. Mark the text and rewrite your desired text and the design will remain the same.
With the image clipping masking technique, you can experiment till you are happy with the design. Then save the image and use it accordingly.
Clipping Mask tool Photoshop is a super useful masking technique you can use to create out-of-the-box designs and attract your target audience easily. Thus, experiment with image clipping and showcase your creativity in projects.
Lastly, if you need professional help with Photoshop Clipping Masks, take Color Clipping’s expert photo retouching services. Send us your materials and requirements and see the transformation. We are strict with perfection and deadlines, ensuring you get the results they paid for and double the ROI. Take our free trial and judge the image quality today. That's it for today. Adieus!

Hi, it's Faria, Content Executive from Color Clipping Ltd with a passion to contribute knowledge sharing more simply. Keep learning and growing with us.