How to Remove a Color in Photoshop in 2024

Read | Loved by: 60134
Photoshop is a magical software. With a little bit of practice, you can manipulate a picture with almost anything. Endless possibilities with endless techniques. If you spend enough time with the software, you may find some of your techniques to do certain edits or retouching. In childhood I used to believe changing colors in a photo was a next-level revolution of the digital world. Well, it is a big revolution for the editing industry. But, nowadays this kind of changing colors has become very common and easy to do. If you have Photoshop installed on your PC or phone, even you can do it. So, let's learn how to remove a color in Photoshop.
2 Different Methods of how to remove a color in Photoshop
Just like you can find different types of recipes for one dish, there are tons of ways to do a task in Photoshop. You follow a recipe according to your available ingredients and making process that is suitable for you. Just like so, you can go with the method of removing a specific color from images in Photoshop that suits you best. So, let’s dive into the methods of removing a specific color from an image.
Method 1: Remove Color with Color Range Technique
Starting the list with the color range technique of removing a color in Photoshop. Let’s do the deed…
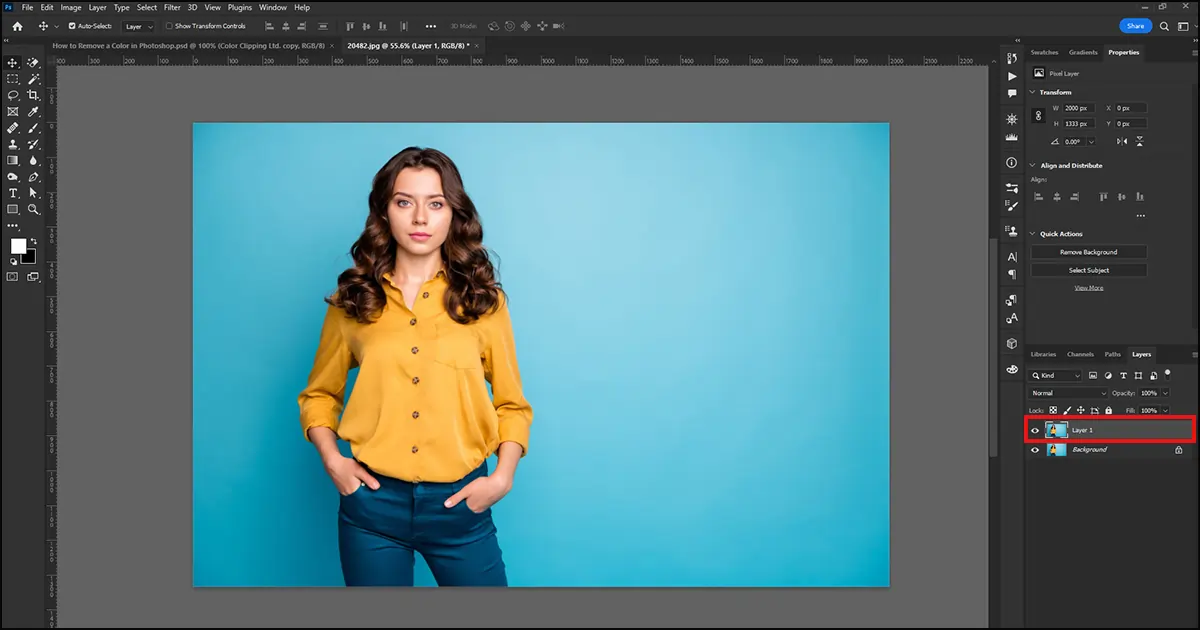
Step 1: Open the images that you want to change the color of in Adobe Photoshop.
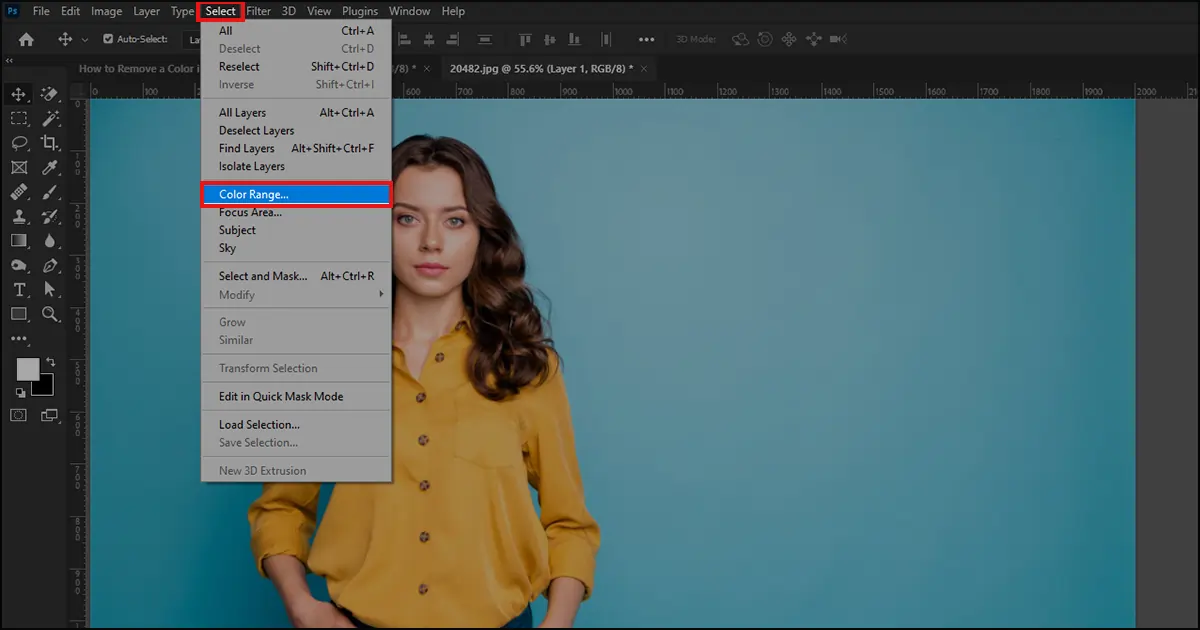
Step 2: To change the color, go to the ‘Select’ menu from the above top toolbar. From the drop-down menu select Color Range. On ‘Color Range’ you will find eye-dropper-looking icons. Click on the left one that doesn’t have any plus or minus sign.
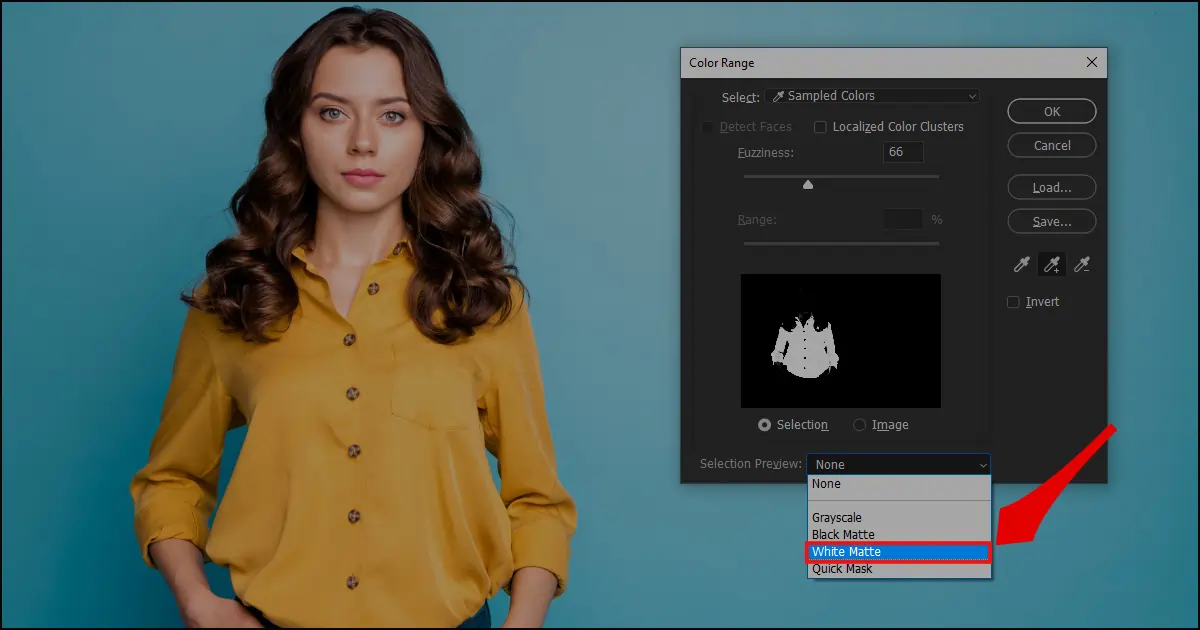
Step 3: After clicking on the eye-dropper icon, click on the color that you want to change or replace. Then click on the eye-dropper icon with the plus icon and drag on the color that you want to remove.
Step 4: From the selection preview menu, select white matte to understand the parts that are selected and you can also select white matte to understand which parts are not selected. (If any other object gets selected from the image for being in the same color, then you need to deselect that part by using a selection tool.)
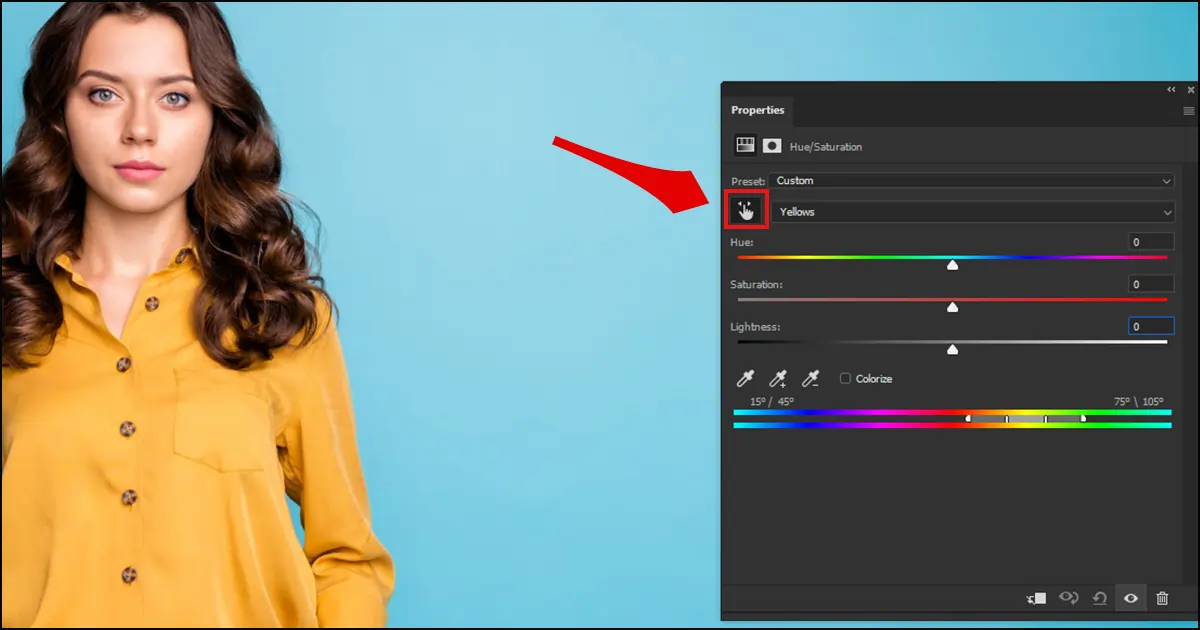
Step 5: Now get to the down-right corner you will find a circle-shaped masking tool. Click on that circle icon and choose Hue/Saturation. Then you can choose the new color that you want.

And finally, you will have the color that you want to have on the specific places that you want. This is the easiest process to recolor or change the color or any specific object from a picture. Especially when you have multiple objects in one image. Recoloring can be done with color range techniques most easily.
Method 2: Remove Color & Replace with Another
This method is also similar to the previous method with different techniques. With this technique as well, you will be able to replace colors. So, let’s get started…
Step 1: Open the image that you want to edit in Adobe Photoshop.
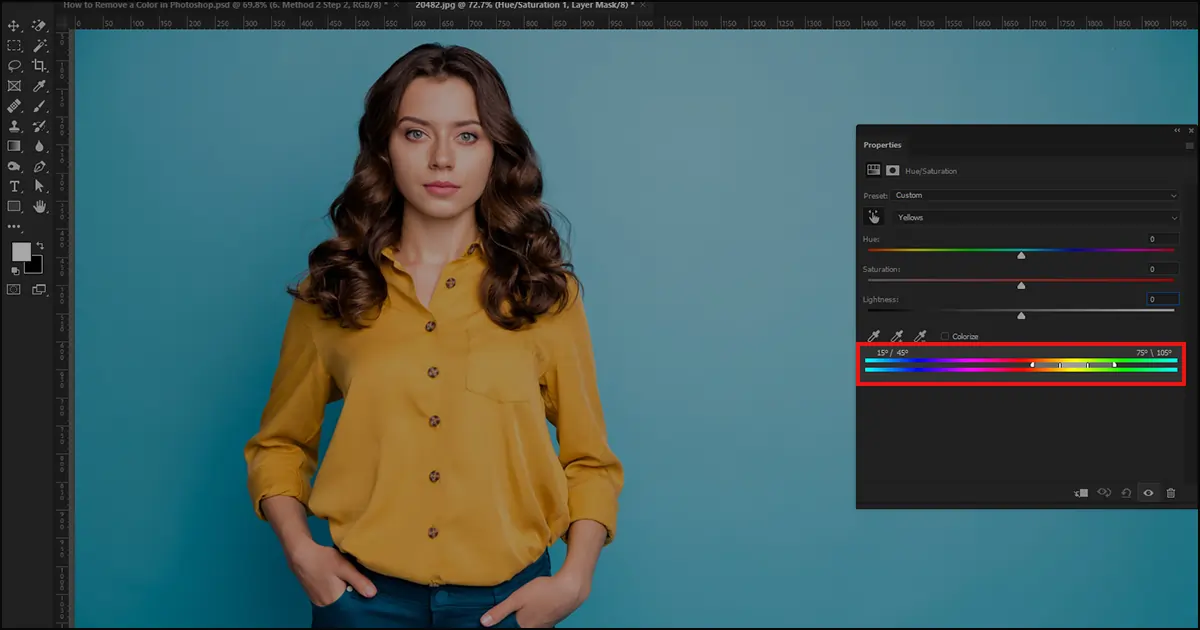
Step 2: Go to the right bottom corner and there you will see a circle icon. Click on the icon and you will find a drop-down menu. From the drop-down menu, select the Hue/Saturation option.
Step 3: From the Hue/Saturation panel click on the ‘Hand Tool’. Just look under the preset and above the Hue option. You will find the ‘Hand Tool’ there.
Step 4: After selecting you will see a drop cursor. Take the cursor to the object or the place where you want to change the color and click on that area.
Step 5: Now, drag the Hue point around the color. The color that you want the object or the place to be. Also, you have to have an even smoother transaction, you have to expand the range from the bottom scale. Now look at the image and if you see there are still some places, where the transaction is not smooth, then you might need to expand the meter even more.
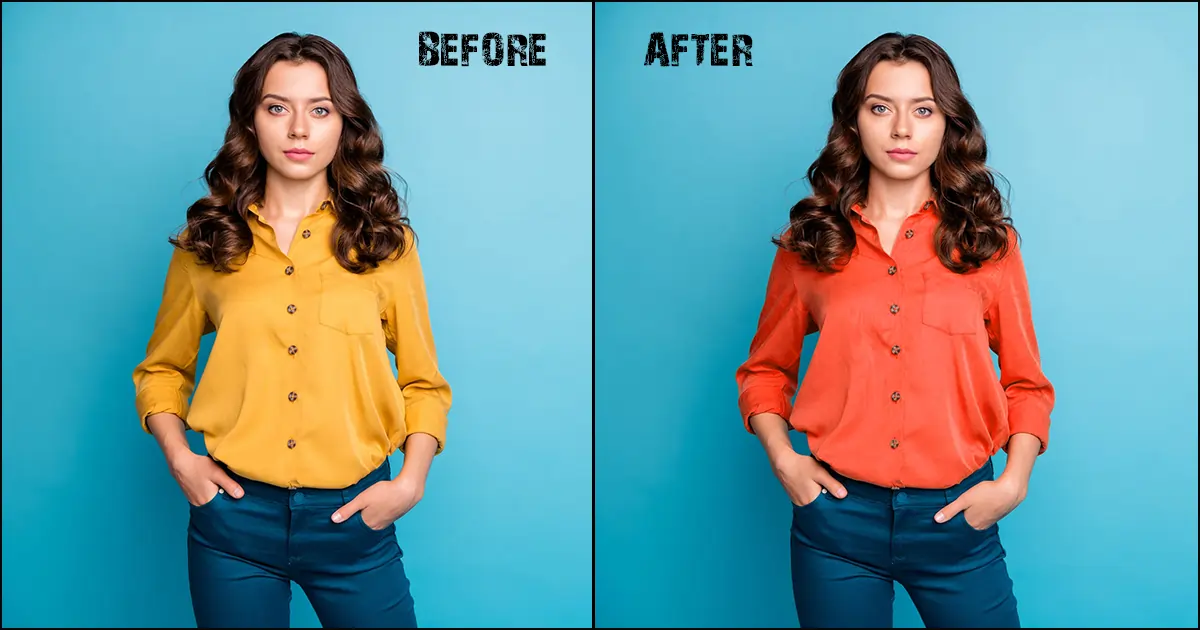
Step 6: That was it with the color-changing process. Now, you can move the anchor point of Hue to select whatever color you like. You might also need to adjust the saturation anchor to make the color even more vibrant or pale. I already mentioned this process in one of my previous blogs about changing the color of clothes. Check this blog to learn more about photo editing and retouching.
Conclusion
I hope you find this blog helpful for your upcoming projects and keep practicing to upgrade your skills in photo editing and retouching. If you are someone who is running a business or overloaded with work, then you can also knock Color Clipping to leave off the burden. Color Clipping is known for doing the bulk amount of image manipulation within a very short time. So, knock us without any hesitation.
FAQ

Anika Wahab
Hello, it's Anika, Content Executive from Color Clipping Ltd with a devotion to contributing my skills and knowledge more simply. Keep learning and growing with us.